Earlier this summer I had my first experience with the Seattle light rail system while exploring around downtown with a few of my friends. I consider myself a huge public transportation enthusiast and user. During my academic year I commute via bus to and from school, in the summers I will also take the bus to work and to places I volunteer at. But as much as I love busing, there’s just something special about traveling underground. This might not sound like the flashiest, most exciting thing to everyone, but personally my experience on the light rail took me back to the summer of my sophomore year in high school when I took a three week long trip to Europe. It made me feel like I was in a big city again and this filled me with excitement. My experience with the light rail made me ask myself “why hadn’t I tried this before…? It’s so convenient!”
There are plenty of people who have not ridden the light rail even though it has been running for over a year now (and recently opened two new stops, including UW Seattle!). If you’ve been one of the people who have not heard much about the light rail, or a little intimidated by it, do not worry! It is not complicated at all there are just a few things to remember:
Paying:
- ORCA Card/Passes (Anyone): Purchase an ORCA card for $5 ($3 for seniors 65+, or riders with disabilities), and add as much many as you like between $5 and $300.
- ORCA Regional Day Passes, can be loaded onto your ORCA card for $8 per day. The Day Pass expires at the end of transit service on the day that it is used. Multiple days can be loaded onto one pass. These passes can also be used for buses, streetcars, trains, and water taxis.
- UPASS (UW Students/Staff): Your Husky Card also works as an ORCA Card! This means that as long as you’ve activated the UPASS feature on your Husky Card, all you have to do is scan your card before AND after getting on/off the light rail.
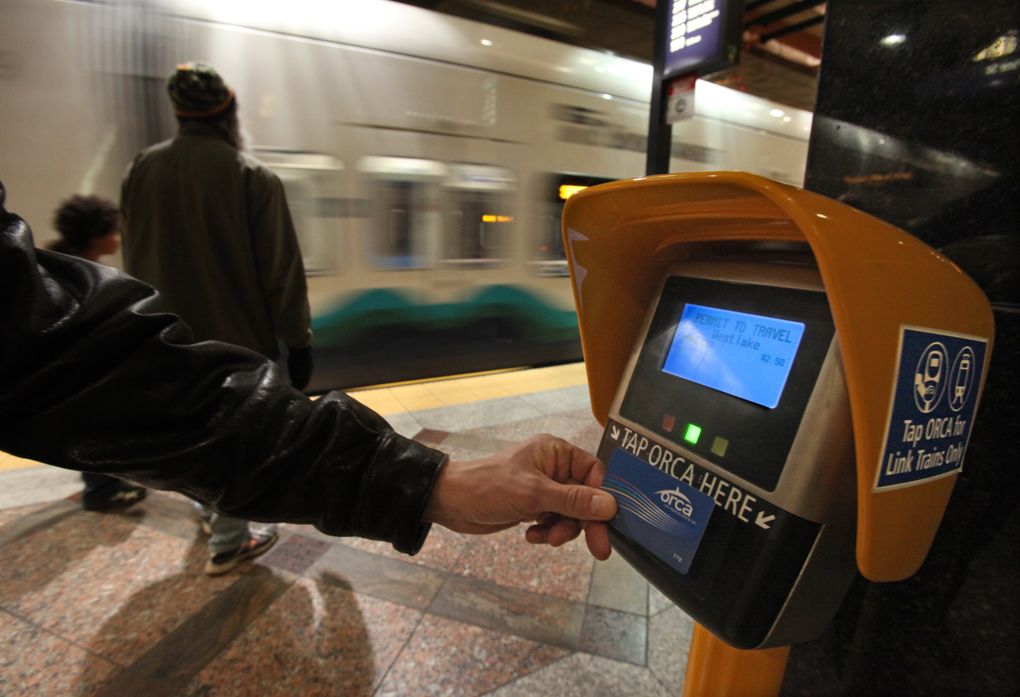
Where to scan your Orca card or UPass – Image via Seattle Times
***Scan before and after getting on/off the light rail (this was something my friends kept needing to remind me of)***
- Tickets (Anyone):
- One-Way: Ticket prices for one-way rides vary (depending on how far your trip is) and range between $2.25-$3.25. You should note these passes are one use only, and intended to be used between the specified stations printed on the ticket.
- Day Pass: Day passes can be purchased for $4.50 and may be used anywhere throughout the Link Light Rail. These are especially nice for if you’re having a friend or relative visit, and you’re wanting to explore around Seattle the whole day.

***Note: Rail tickets can only be used for the light rail, unlike the ORCA cards and UPASS.***
Etiquette
- Off the rail:
- Stand to the right on the escalators going up or down if you will not be walking up them. As much as you might want to stand next to friend or loved one on the escalator (or take in the sights of the underground), there’s people who need to get to work on time or make it to an appointment, by standing to the right you’re giving them space to walk (sometimes run) up the escalators.
- Have your pass/ticket ready to scan, this way everyone can get to their destination much faster.

- On the rail:
- Stay away from the doors! You don’t want to be the person blocking the entrance/exit for everyone else. If the train is reaching max capacity, do your best to make room for people exiting.
- Don’t take up more space than you need for yourself, this includes laying on the seats, placing a backpack or purse on a seat next to you, etc.
- Don’t do anything that would require you to have a private space, the light rail is meant for transportation (this also includes eating on the rail, don’t feast on the rail).

Planning
- Use the Sound Transit Website to find when the next train arrives.
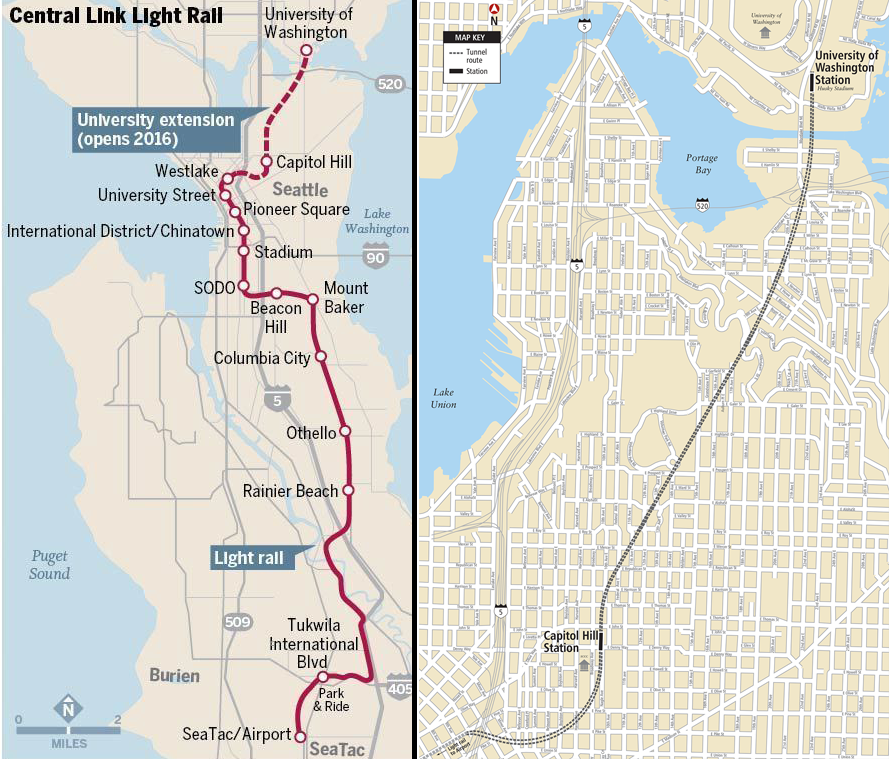
- Use this map of the rail to find where the stations are located (entire red line, including the dashed part is open for use):
- Google Maps: You can use Google Maps to typing in the location of the place you want to get to, and where your trip would start from.
- Google Maps also lets you choose what method of transportation you would like to use, by clicking on the image of the light rail, then it can give you the best walking or driving route to the light rail.
- You can also find routes with less walking (which my result in a longer commute time from taking multiple buses).
I found my experience with the Link Light Rail to be very excited and worry free, I hope that with these tips anyone who felt a little intimidated or less inclined to ride the light rail, will be find it easier to understand.