Crochet Crafts: Library Themed

Having worked at the library for several months, I have met many wonderful staff members who help keep our building running and who support students. Among these staff members (and student employees), a running theme between them that I have noticed is that many partake in fabric arts (things like crochet, knitting, quilting, etc.). So, I thought it was only fitting to write a blog post about different library-themed crocheted crafts. I myself am only a beginner crocheter with just a few projects under my belt, so the crafts that I will be recommending are best suited for beginners.

If you are new to crochet and need help figuring out where to get your supplies, there are a lot of places to buy from. I typically buy my yarn and hooks from Michael’s or Joann Fabrics and Crafts. These stores have a great selection of both value yarn and expensive yarn. If you go to these stores and nothing piques your interest, Hobbii is also a great website to check out for yarn supplies (bear in mind, Hobbii is based in Denmark, so you will have to account for shipping costs). Additionally, you can go to any local yarn store and have a wonderful selection to choose from.

Starting off in a new hobby can be overwhelming because you do not always know what to buy. As a beginner, I would recommend that you buy the yarn of your choice, a hook, and some sort of sewing needle (I like to use these ones from Susan Bates). When buying the hook, make sure the size of it corresponds to the yarn that you purchased. To find out what hook size you need, check out the label on the yarn you buy (the label typically has information like the weight of the yarn, the type of yarn, hook size, and needle size).

Tassel Bookmark

Click here for tutorial

This pattern is easy to follow with both a written and video tutorial to work from! If you would prefer the bookmark without the tassel, you can totally skip that step; the bookmark will look very nice regardless! This pattern has single crochets together, which (if you have never done those before) is essentially 2 or more unfinished single crochets crocheted together. If you know how to single crochet, you can do single crochets together.

  • Stitches to know: single crochet, double crochet, slip stitch, chain stitch
  • Yarn I used: Sirdar Cotton DK Sunshine
  • Hook size: 4 mm (G/6)

Flower Bookmark

Click here for tutorial

This pattern is easy to follow and results in a very cute flower bookmark! This pattern is divided into 2 parts, one part dedicated to the petal portion of the flower and the other part for the stem. Because these two parts are crocheted separately, the petals need to be sewed on to the stem. If you have not sown crocheted pieces together before, here is a helpful video to watch!

  • Stitches to know: single crochet, double crochet, triple crochet, half double crochet, slip stitch, chain stitch
  • Yarn I used: Solid Worsted Value Yarn Big Twist Orange, Luxe Merino Solid Yarn Loops and Threads Avacado
  • Hook size: 5.00 mm (H/8) for flower and 4.00 mm (G/6) for stem

Glasses pouch

Click here for tutorial

This pattern might look intimidating at first because of the drawstrings you need to make, but it is actually pretty easy! While this pattern does not have a video tutorial, the instructions are easy to follow and the pictures illustrate the steps well. If you have bigger frames, then I would recommend chaining more for the starting chain than what the pattern suggests.

  • Stitches to know: single crochet, double crochet, slip stitch, chain stitch
  • Yarn I used: Winter Glow Light Worsted Pale Lavender/Powder/Green Tea/Cardamom
  • Hook size: 5 mm (H/8)

Book sleeve

Click here for tutorial

Book sleeves are perfect for protecting your book. If you do not feel comfortable crocheting with two strands at once (as suggested in the tutorial), then you can certainly size up the yarn you use and crochet with just the one strand. If you choose to size up, I would recommend using a bulky weight yarn (weight 5). This pattern requires you to sew on a button, which might sound difficult, but the tutorial (which is a video) will show you how to do it. If you prefer, you can always omit the button step, just know that your book would have a chance of falling out of the sleeve.

  • Stitches to know: single crochet, half double crochet, slip stitch, chain stitch
  • Yarn I used: Solid Worsted Value Yarn Big Twist Grape, Solid Worsted Value Yarn Big Twist Orange
  • Hook size: 6.00 mm (J/10)

Book worm

Click here for tutorial

Who better to accompany you to the library than a book worm? This pattern recommends 80 chains, but I preferred a shorter tail and only chained 65. You will need extra supplies for this pattern, such as small googly eyes and a hot glue gun. Sadly, I did not manage to find any googly eyes small enough for my worm, so I ended up stitching on some yarn with black thread instead.

  • Stitches to know: double crochet, slip stitch, chain stitch
  • Yarn I used: Winter Glow Light Worsted Pale Lavender/Powder/Green Tea/Cardamom
  • Hook size: 5.00 mm (H/8)

———————————————————————————————————

If you want to crochet more things but don’t know where to start, you can check out some crocheting books from our library!

DISCLAIMER: The books mentioned above contain a range of difficulty levels, so they may not be as beginner friendly. Don’t let that stop you from giving them a try though!


De stress with Origami

School can be difficult, and sometimes exactly what can help all the bottled stress is trying something completely different. So next time you feel as if you need a break from studying, try some of these easy DIY projects! You don’t have to be an expert on paper craft to appreciate the ancient art of folding paper that is origami. All of the projects listed below are rated on a scale from one to five, with five being the most difficult and one being the simplest. For the purpose of this activity, i.e de-stressing, all projects are rated three and below. Here is a list of some easy projects to get started with!

Supplies:

Square pieces of paper approximately six inches by six inches. You can use origami paper but any other thin sheet will work as well, such as printer paper. If you do not have a square piece of paper follow instructions here to make some. One of the reasons that makes origami so great is that it requires very few materials, and thus is accessible to a wide audience.

Fun and simple origami projects:

The Classic Crane:

  1. Video Instructions: Crane Video Instructions
  2. Written Instructions: Crane Written Instructions
  3. Difficulty Rating: 3 on a scale of 5
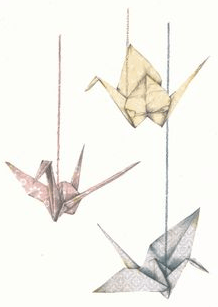
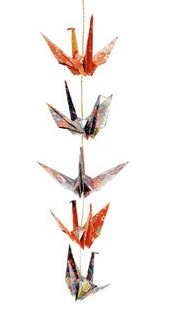
  4. Additional Notes: An ancient Japanese legend holds that if you fold 1,000 paper cranes in one year you will be either granted a wish, or receive good luck. While 1,000 is likely unattainable for the busy college student, try out this project if you have 5 minutes to spare. Additionally, paper cranes can make beautiful decorations using patterned paper or strung together!

    Capture0
    Image found here

Jumping Frog:

  1. Video Instructions: Frog Video Instructions
  2. Written Instructions: Frog Written Instructions
  3. Difficulty Rating: 3 on a scale of 5
  4. Additional Notes: If you’re looking for a fast, and entertaining project to take up some time, look no further than the jumping frog! This project will only take you less then 5 minutes, yet this creation is something that you can play with for a long time after-just don’t become too distracted!

    Capture1
    Image found here

Lotus Blossom:

  1. Video Instructions: Lotus Video Instructions
  2. Written Instructions: Lotus Written Instructions
  3. Difficulty Rating: 2 on a scale of 5
  4. Additional Notes: The lotus project not only creates something beautiful but also something functional as well. This project makes a wonderful addition to any study space and serves as a great place to hold items, as well as for decoration. Additionally there are many more origami creations that build off of the lotus design, making this a useful project to know overall if you are interested in pursuing more origami .

    Capture2
    Image found here

Butterfly:

  1. Video Instructions: Butterfly Video Instructions
  2. Written Instructions: Butterfly Written Instructions
  3. Difficulty Rating: 2 on a scale of 5
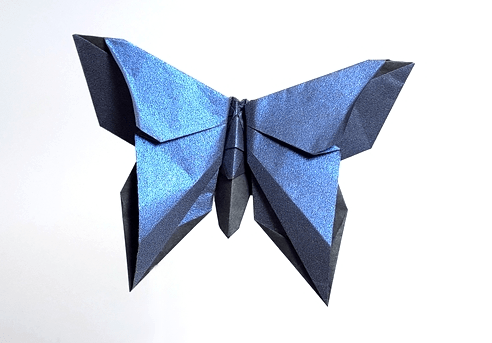
  4. Additional Notes: The origami butterfly is a project like the crane that can be turned into a beautiful decoration as well as a fun occupation of time. They stick well to walls with any form of adhesive and can be used to liven up any space. Try this project with a variety of different papers to explore different crafting styles.

    Capture3
    Image found here

Wallet or Envelope:

  1. Video Instructions: Wallet Video Instructions
  2. Written Instructions: Wallet Written Instructions
  3. Difficultly Rating: 1 out of 5
  4. Additional Notes: The origami wallet/envelope is the simplest project featured on this list, but it is one of the most versatile. In addition to being a great de-stressing project, the product of this activity will yield a useful item that can be easily used to hold anything from flashcards to extra pens.

    Capture3
    Image found here

Overall Tips:

It is easy to become overwhelmed whenever you decide to pick up a new craft, especially where specific terms are concerned. Origami is no different and when reading over instructions getting lost in the terminology is one quick way to becoming confused. Below I have listed several resources that you can turn to for any clarification about names or types of folds.

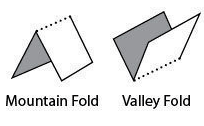
  • Rather then explaining what corners to fold where at the start, origami instructions often use the term “valley or mountain” to refer to which way the paper should be creased/standing. Look here to find out the basics of this differentiation.
  • All origami projects that feature the creation of a 3D object, such as a box or basket, rely on a step called a squash fold. In basic terms the “squash” refereed to in the name is simply the neat art of learning how to delicately smash your paper. Look here for much more information and projects containing the squash fold.
  • Finally here is a breakdown of all different terms/folds you may find in any instructions and how to properly execute them.

    Capture
    Image found here

Searchable websites featuring hundreds of other origami projects:

If you want something a bit more difficult, or just feel like something different then the projects featured above, I recommend taking a look through any of these sites.

Happy Folding!

Capture
Image found here