Git allows you to keep track of your software by committing files to an internal repository:

As you keep making changes to these files, git will update its internal copy, but also keep old version in history. This makes it possible to switch back and forth between old and new versions, if you need to do so.
What git is good for:
* Keeping track of your software (”.m”, ”.py”, ”.cpp”)
* Keeping track of text-based files and data (”.txt”, ”.csv”)
* Making fun of people who still use subversion
* Reproducible research: Making official releases, automatically running test suites,
What git is not so good for:
* Storing private information. Most repos on GitHub are public by default. You can create private ones via the [[https://github.com/viscog|VisCog]] group. However, be aware that once something has been committed to git, it will remain in the git history, even though it appears to have been deleted.
* Keeping track of binary files (.exe, .jpg, .mat). Git won’t know what has changed since last time, so will always upload the entire file.
* Keeping track of large files. Don’t upload anything > 50 MB! It will clog up your system, and git won’t even allow you to go above 100 MB. There’s also Git Large File Storage but last time I checked it was still a bit buggy.
Using Git
There are two main ways our lab uses git. Via GitBash or via GitKraken. If you are comfortable with command line/unix you probably want to use the former. GitKraken is easier, but a little less flexible.
Git Bash
Installation
Follow the Software Carpentry instructions for installation.
You can verify your installation by opening a terminal (or Git Bash on Windows), and typing: <code> $ git –version </code>
This should output some valid version, e.g. “git version 2.7.4”, and not raise an error.
Setting up git
Git allows for a lot of customization options. The ones you’ll probably need the most are the following:
1. Associate your work with your name and email address: $ git config –global user.name “Vlad Dracula” $ git config –global user.email “vlad@tran.sylvan.ia”
2. Make git output look pretty: $ git config –global color.ui “auto”
3. Set your favorite editor.
On Mac OS X / Linux, I recommend using nano (since it’s easier than vim): $ git config –global core.editor “nano -w”
On Windows, I recommend using either Notepad++ or SublimeText.
For Notepad++ on Win32:
$ git config –global core.editor “‘c:/program files (x86)/Notepad++/notepad++.exe’ -multiInst -notabbar -nosession -noPlugin” Notepad++
on Win64: $ git config –global core.editor “‘c:/program files/Notepad++/notepad++.exe’ -multiInst -notabbar -nosession -noPlugin”
Sublime 3 on Win32: $ git config –global core.editor “‘c:/program files (x86)/sublime text 3/sublime_text.exe’ -w”
Sublime 3 on Win64: $ git config –global core.editor “‘c:/program files/sublime text 3/sublime_text.exe’ -w”
You can find a list of popular editors
Adding an existing project to git
Adding your code to a local git repository
Let’s say you have some existing software in a folder called “project” that contains the following files: <code> project/data_analysis.m data_analysis_even_newer.m data_analysis_newest.m data_analysis_new.m data_analysis_old.m data_analysis_test.m
We want to add these files to a repository so git can keep track of them.
1. Make sure you’re in the right directory: $ cd project
2. Initialize an empty git repository $ git init
3. Tell git to track the file by adding it what’s called the staging area, and repeat this step for every file you care about: $ git add data_analysis_even_newer.m
4. Create a snapshot of the current files by committing them to the git repo. We also specify a commit message (with the -m flag), so that in 3 months we still remember what we did: $ git commit -m “Add data analysis files” And done! Continue your project. Make changes to the data analysis files, until you’re ready to make a new commit. At that point, repeat steps 3 and 4.
Getting your local git repository into the cloud (aka GitHub)
You now have a fully functioning git repo. However, so far this repo only exists on your local machine – and if your hard drive dies, you’re still screwed. Instead, we want to push all our local code to the cloud (aka GitHub)
1. If you haven’t done so, sign up for a GitHub account
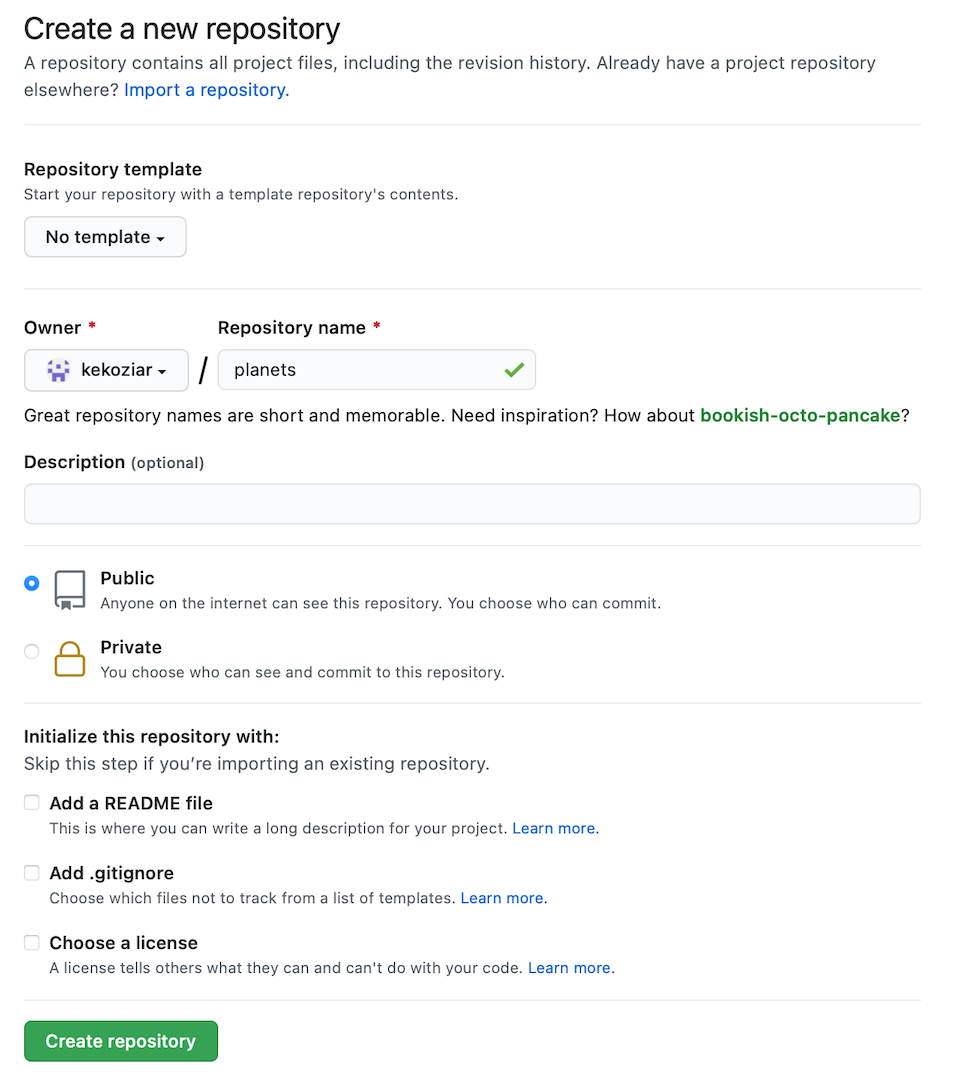
2. Log in to your GitHub account and click on the + icon in the top-right corner to create a new repository:

3. Give your repository a meaningful name (e.g., the guy in this image named his repo “planets”). This is where all the code we added above will go:
 As soon as the repository is created, GitHub displays a page with a URL and some information on how to configure your local repository:
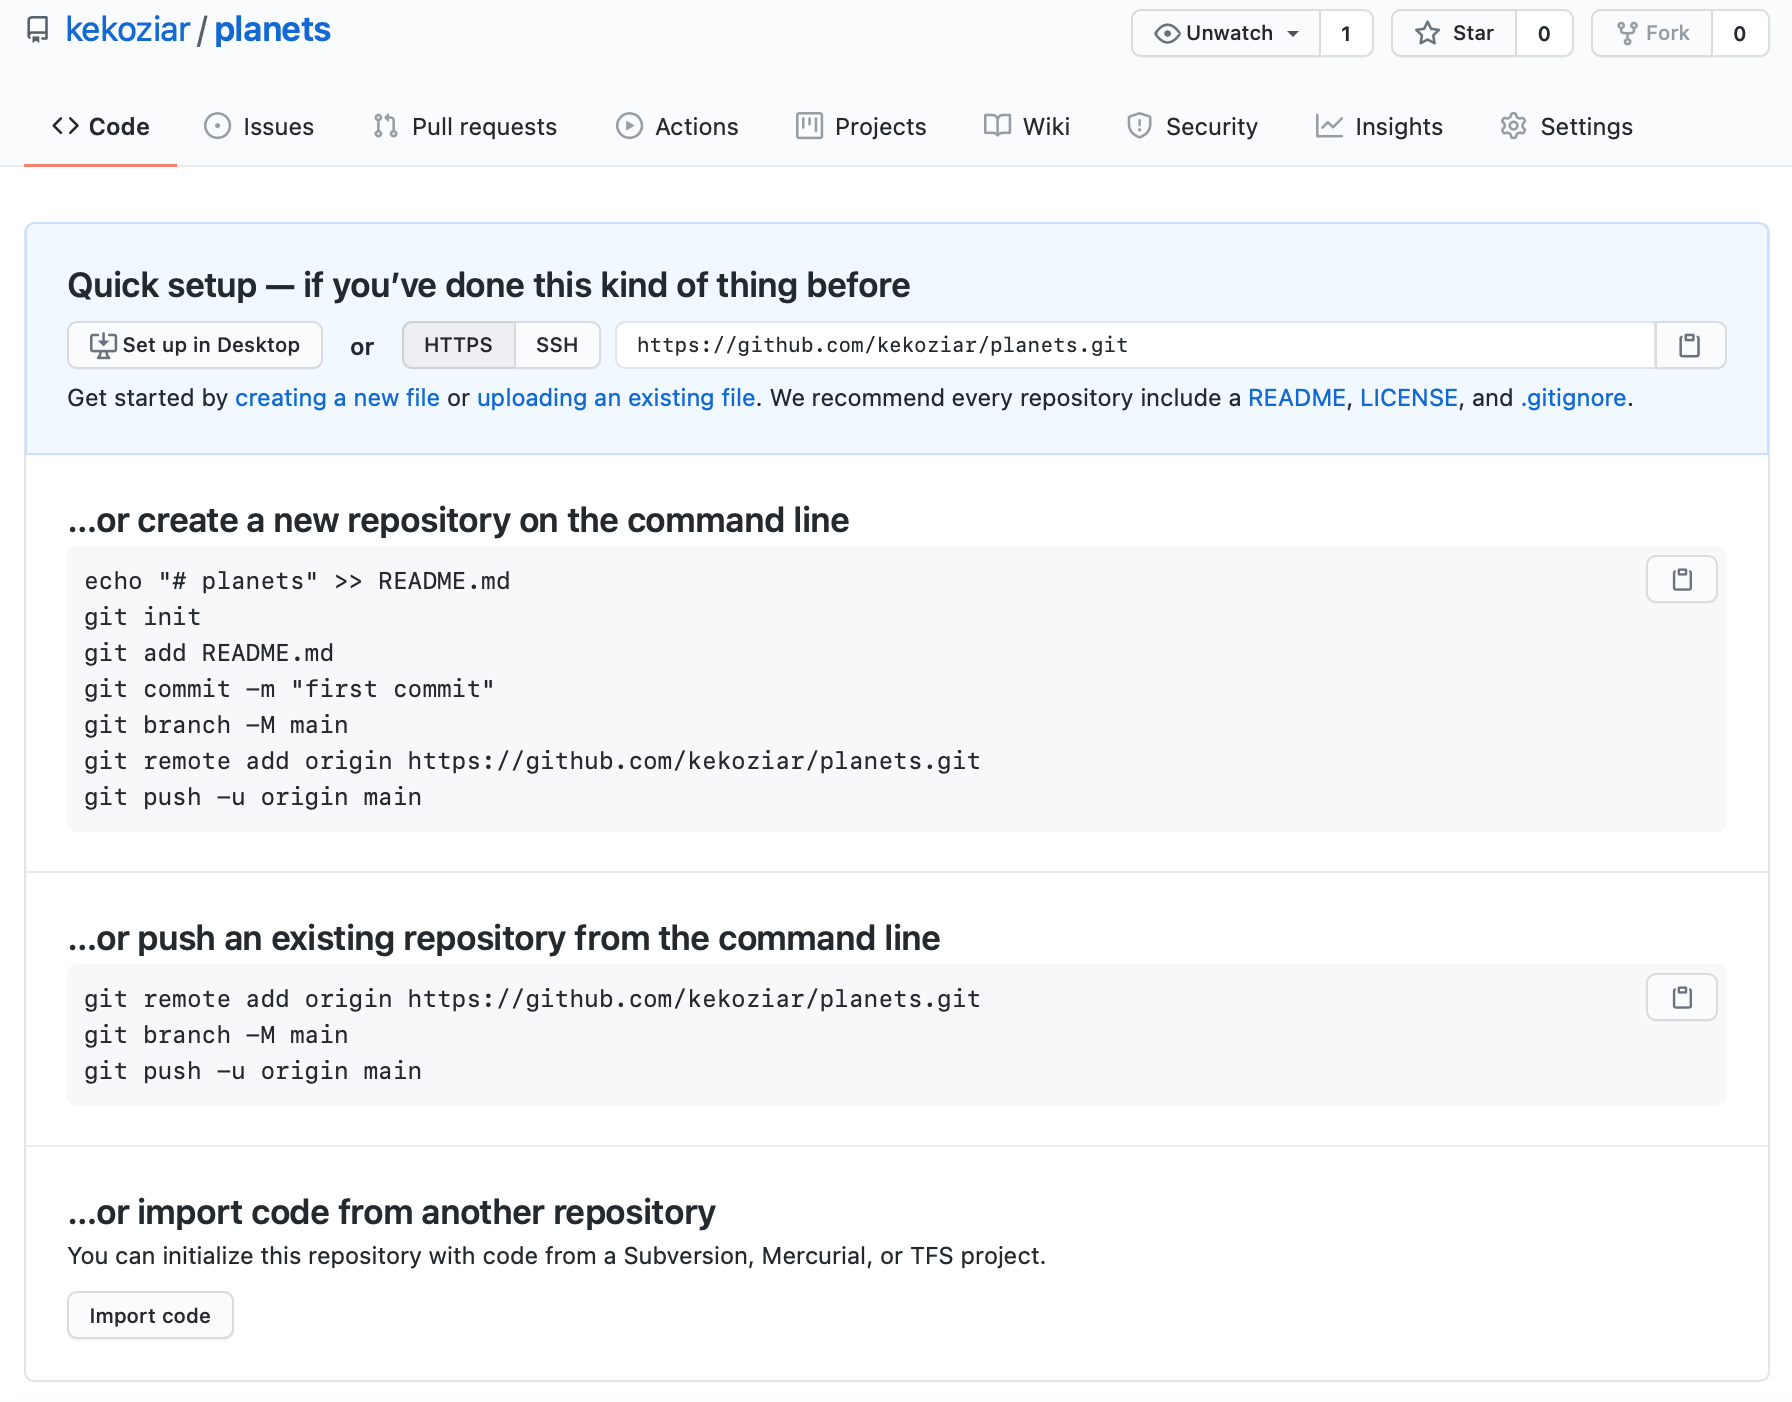 This basically does the following on GitHub’s servers: $ mkdir planets $ cd planets $ git init
4. The next step is to connect the two repositories. We do this by making the GitHub repository a remote for the local repository. The home page of the repository on GitHub includes the string we need to identify it:  5. Copy that URL from the browser, go into the local “project” repository we created above, and run this command:
$ git remote add origin https://github.com/<your username>/<your repo>.git
6. We can check that the command has worked by running:
$ git remote -v origin https://github.com/<your username>/<your repo>.git (push) origin https://github.com/<your username>/<your repo>.git (fetch)
The name origin is a local nickname for your remote repository (i.e., the one on GitHub). We could use something else if we wanted to, but origin is by far the most common choice.
7. Once the nickname origin is set up, this command will push the changes from our local repository to the repository on GitHub:
$ git push origin master
Now all your code also lives in the cloud! You can check it out by logging in to your GitHub account. You’re all set. Continue working on your code. If you’re ready to take new snapshots, follow steps 3-4 from the previous section (git add and git commit). Then add step 7 from this section (git push) to also save the changes to the cloud.
Git commands everyone should know
$ git help Display the help along with common usage examples.
$ git help <command> Get help on a specific command.
$ git status Gives a status report of the current directory; i.e., which files have been added, which files exist in the directory but aren’t tracked, etc.
$ git log Show a list of all previous commits.
$ git diff Show all changes since last commit.
FAQ
How do I delete a file I accidentally added?
$ git rm <file> will remove the file both on disk (same as bash command ”rm”) and in the local repo. Run $ git commit to save changes.
How do I rename a file?
$ git mv <old-name> <new-name>
will rename a file both on disk (same as bash command ”mv”) and in the local repo. Run ”$ git commit” to save changes.
Some editor window opened up, and I don’t know how to get out of it. Help?
Nano: If you’re in Nano (top of the screen will read “GNU nano 2.5.3 or similar”), press ”Ctrl+X”, then press Y to save any changes or N to exit without saving. All Nano commands are also displayed at the bottom of the window (e.g., ”^X” stands for ”Ctrl+X”).
Vim: If you’re in Vim (bottom of the window will display the filename and infos, e.g. “myfile.text” 300L, 14045C”), enter ”:q” to quit, ”:wq” to save changes to quit, or ”:q!” to panic and quit.
Do I really have to type in my username and password every time I git push?
You can have git cache your password for some amount of time, e.g. 1 hour:
$ git config –global credential.helper ‘cache –timeout=3600’
I have no idea what I just did, but I think I broke everything. Plus there’s smoke coming out of my screen. What do I do now??
 }} ====
Resources
The above is basically a shorter version of the lectures in Software Carpentry